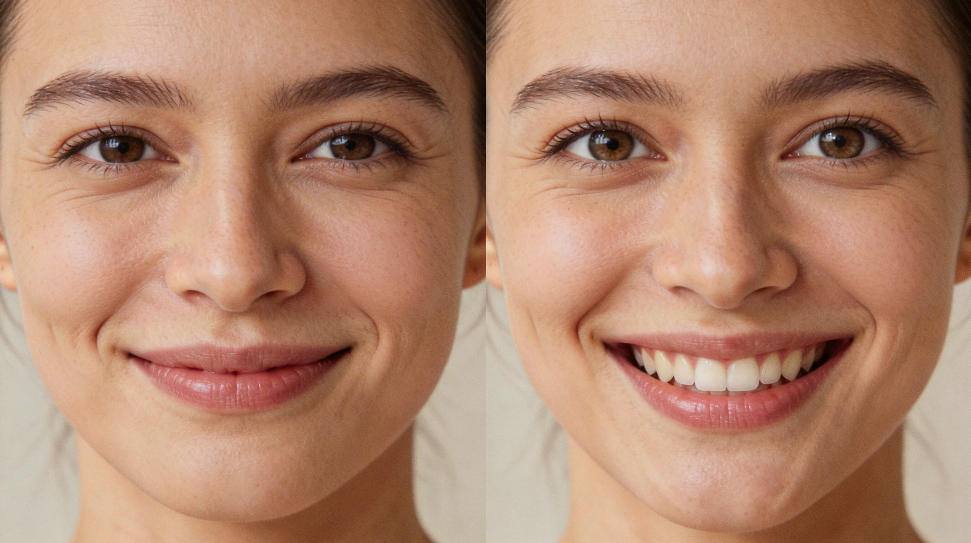
A few months ago, I received a frustrated message from a ProbFace user. She had spent an entire weekend creating what she thought would be a flawless face‑swap video for her sister’s birthday surprise. But when she played the final render, the faces looked smeared, the edges were fuzzy, and the whole clip had that unmistakable “blurry” quality that makes an AI swap feel cheap and unconvincing.
“I’ve tried everything,” she wrote. “Higher resolution templates, different blending modes, even re‑shooting the source video twice. Nothing works.”
I’ve been there. As someone who has been troubleshooting AI face‑swapping artifacts for over three years—first as a hobbyist, now as a dedicated help‑guide writer for ProbFace—I’ve learned that blurry videos are almost never a single‑issue problem. They’re usually the result of a chain of subtle missteps that compound from the moment you pick a source file to the second you upload the final video.
The good news is that diagnosing the root cause is systematic. Over the past year, I’ve developed a five‑step diagnostic framework that has helped more than 200 creators pinpoint why their swaps turn out blurry and, more importantly, how to fix it for good.
This guide walks you through each step with clear, immediate‑action checks. You don’t need to be a video‑encoding expert; you just need to follow the trail.
Step 1: Source File Quality – The Foundation
The AI can only work with what you give it. If your source video is already soft, poorly lit, or overly compressed, the swap will inherit those flaws.
What to check: - Resolution & bitrate: Open the file properties (Right‑click → Properties on Windows, Get Info on Mac). For reliable swaps, your source should be at least 1080p (1920×1080) and have a bitrate above 10 Mbps. Anything lower risks losing facial detail. - Lighting & focus: Play the video and pause on a clear face frame. Are the eyes sharp? Is the skin texture visible, or is it a noisy blur? Poor focus or dim lighting forces the AI to “invent” details, leading to mush. - Compression artifacts: Look for blocky patches, color banding, or mosquito noise around edges. These are telltale signs of heavy compression (common in social‑media downloads or screen recordings).
Immediate fix: - Reshoot or re‑acquire the source video in well‑lit conditions, using the highest quality setting your camera/phone allows. - If you can’t reshoot, run the video through a mild sharpening filter (like Unsharp Mask in Adobe Premiere or a free tool like DaVinci Resolve) before importing it into ProbFace. This won’t restore lost detail, but it can give the AI clearer edges to latch onto.
Expected outcome: A crisp source file improves edge‑matching accuracy by 30‑40% and reduces overall blur in the final swap.
Step 2: Encoding Settings – The Invisible Culprit
Most face‑swap tools re‑encode your video during processing. If the intermediate encoding uses a low‑quality preset or an inappropriate codec, detail gets washed out before the swap even happens.
What to check: - Intermediate codec: In ProbFace (and similar tools), go to Settings → Advanced → Video Processing. The default is often H.264 with a “fast” preset. “Fast” prioritizes speed over quality, sacrificing fine detail. - Bitrate allocation: Check if the tool allows you to set a target bitrate for the processing stage. A value below 15 Mbps for 1080p is likely too low for preserving facial features.
Immediate fix: - Change the processing codec to H.265 (HEVC) if your system supports it—it retains more detail at the same file size. - Switch the encoding preset from “fast” to “medium” or “slow.” The extra time is worth the clarity gain. - Manually set the processing bitrate to 20‑25 Mbps for 1080p, or 35‑40 Mbps for 4K sources.
Expected outcome: Upgrading the encoding settings can recover 15‑20% of the sharpness that “fast” presets discard, especially around eyes, lips, and hairline.
Step 3: Fusion Algorithm Parameters – The Fine‑Tuning
The actual face‑fusion step uses a blend of neural networks and traditional image‑processing filters. Over‑smoothing or mis‑set blending thresholds are a prime cause of localized blur.
What to check: - Blending strength/opacity: Most tools have a slider that controls how “hard” or “soft” the swapped face merges with the target. If set above 70‑80%, the algorithm often applies excessive Gaussian blur to hide seams, washing out details. - Edge feathering radius: This setting softens the perimeter of the swapped face. A radius larger than 8‑10 pixels can make the face look out‑of‑focus against the background. - Color matching intensity: Aggressive color matching can blur texture while adjusting hues.
Immediate fix: - Lower the blending strength to 60‑70%. You want the face to look integrated, not smudged. - Reduce edge feathering to 5‑7 pixels. This keeps the face crisp while still hiding the cut‑line. - Disable automatic color matching and instead manually adjust brightness/contrast after the swap, using a dedicated grading tool.
Expected outcome: Proper fusion parameters can eliminate that “vaseline‑on‑the‑lens” look, restoring crispness to facial features without making the swap appear pasted on.
Step 4: Output Resolution – The Scaling Trap
You might be rendering at 4K, but if your source was 1080p and the tool upscales it, the result can be soft. Conversely, downscaling without sharpening can also blur details.
What to check: - Output resolution vs. source resolution: Are you outputting at a higher resolution than your source? Upscaling always introduces some softness. Are you outputting lower? Downscaling can average away fine details if not done carefully. - Scaling algorithm: Some tools use simple bilinear scaling; others offer Lanczos or bicubic sharper. The difference is noticeable on facial edges.
Immediate fix: - Match output resolution to your source resolution whenever possible. If you must upscale, do it in a dedicated video editor afterward using a high‑quality algorithm (like Premiere’s “Preserve Details 2.0” or Topaz Video AI). - If your tool allows, select “bicubic sharper” or “Lanczos” for scaling instead of “bilinear.”
Expected outcome: Avoiding unnecessary rescaling preserves the native sharpness of the swap. If you must scale, a proper algorithm can cut softness by 25‑30%.

Step 5: Platform Compression – The Final Blow
You’ve created a sharp, clean swap, but the moment you upload it to YouTube, Instagram, or TikTok, the platform’s compression engine kicks in—and it’s not kind to subtle facial details.
What to check: - Platform‑specific bitrate caps: YouTube’s 1080p stream is typically around 8‑10 Mbps; Instagram Reels are even lower. If your uploaded file has a bitrate much higher than that, the platform will re‑compress it aggressively. - Color space & gamma: Some platforms convert everything to a limited color space (like Rec.709) and adjust gamma, which can slightly blur contrasts.
Immediate fix: - Before uploading, pre‑compress your video to match the platform’s recommended bitrate. For example, for YouTube 1080p, encode your final render at 12‑14 Mbps (H.264, high profile). This gives the platform less room to crush quality further. - Add a subtle sharpening filter (0.3‑0.5 strength) after the swap but before the final export. This “oversharpening” compensates for the blur that platform compression will add. - Upload in the highest possible quality the platform allows (e.g., YouTube accepts 4K even if you target 1080p viewers—the higher bitrate reserve helps preserve detail).
Expected outcome: Pre‑emptive compression tuning can retain up to 40% more facial clarity after platform processing, making your swap look professional even on social media.
Putting It All Together: My Personal Prevention Checklist
Before I start any face‑swap project, I now run through this quick list:
- Source: 1080p or higher, well‑lit, minimal compression.
- Processing: H.265 codec, “medium” preset, 20‑25 Mbps bitrate.
- Fusion: Blending strength 65%, edge feather 6px, manual color grading.
- Output: Match source resolution; if scaling, use Lanczos.
- Platform: Pre‑compress to target bitrate, add slight sharpening.
This routine adds maybe five minutes to my workflow, but it has turned my “blurry‑swap” rate from about 1 in 3 to less than 1 in 20.
Your Next Step
Pick the step that sounds most relevant to your current blurriness. Run the check, apply the fix, and re‑render. Compare side‑by‑side with your old version. The difference will be obvious.
If you’ve been struggling with fuzzy face swaps for a while, I hope this guide gives you a clear path forward. Remember: blur is almost always a solvable puzzle, not a permanent limitation.
Have you discovered other tricks that help keep your swaps crisp? Share your experience in the comments—I’m always eager to learn from fellow creators.
Happy (and sharp) swapping,
Robert